 SEARCH
 FIND A DEALER
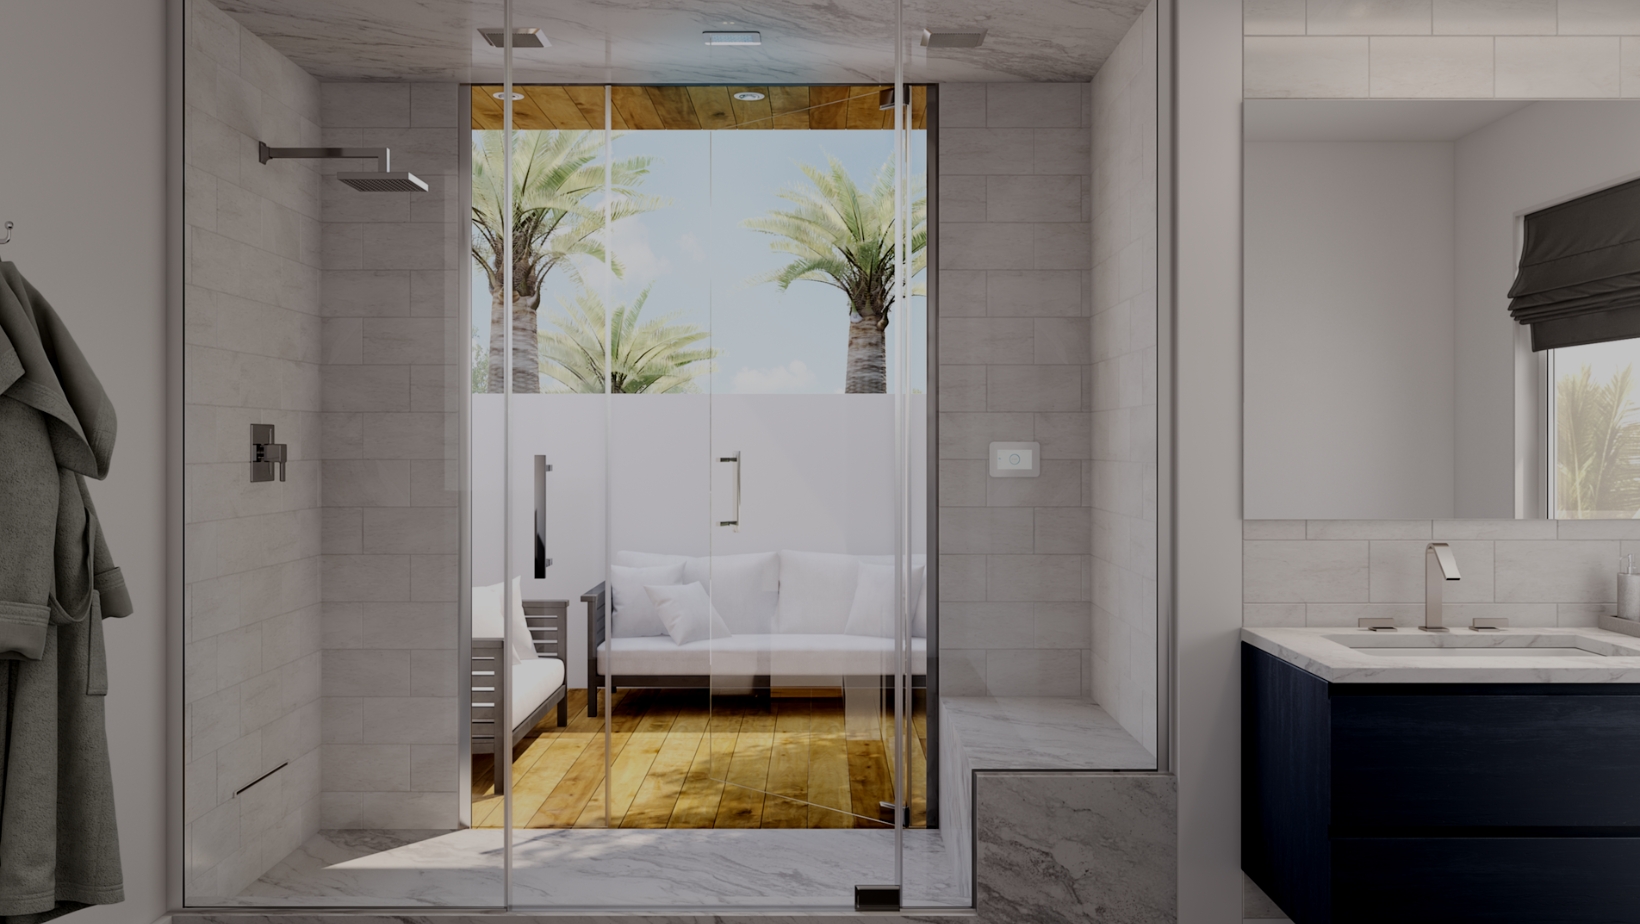
Whether you are a builder or designer, your prospective client doesn’t just want a place to rest their head. They want a luxury experience that reflects their taste. Luxury steam showers provide that in-home, high-end spa experience in a way accessible by any budget.
Aside from a steam shower’s convenience and wellness benefits, installing a steam shower is an excellent economic investment. Studies have shown that steam showers can increase a home’s value by as much as 30.7%.
Naturally, the cost of installing a steam shower depends on whether you are building a new home or replacing a traditional shower in an existing home.
Once your customer selects their favorite materials and finishes, you can follow the appropriate technical installation manuals to deliver on your vision.

 Converting an Existing Shower vs. Constructing a New Room
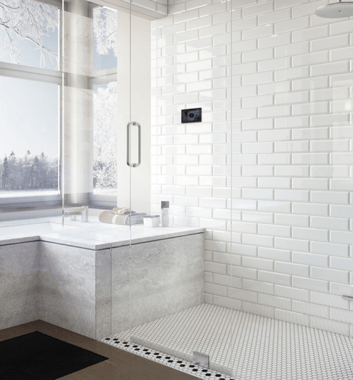
Retrofitting an existing bathroom with a steam shower presents different challenges than creating a new one. For instance, the conversion of an existing shower is limited by the size of the original shower compartment. New bathrooms are limited only by imagination and budget.
When converting an existing bathroom, you must be sure that the original electrical and plumbing are adequate to support the new steam shower and the various components. Convert windows to double-pane glass. Existing lighting must meet safety requirements.
On the other hand, new construction allows you to create your customer’s dream home spa.
Installing a Home Steam Shower
Regardless of whether the steam shower is a new room or a replacement, there are some best practices and installation tips to ensure good results.
OVERALL SPACE
If you are converting an existing shower, you have little choice in how much space you have without engaging in a more extensive renovation. However, if you create a new area, you should think of the needed space beyond simply Volume=Length x Width x Height.
 Instead, leverage the science of anthropometry when planning a custom steam shower.
When computing the ideal amount of space required, anthropometry considers the client’s dimensions, such as height, weight, and body mass.
Anthropometry influences steam room size by highlighting how the average person moves. The body’s physical reach, sight lines, and movements within the shower come into play.
Because heat rises, the ceiling height of the shower room is another important consideration. The maximum height of a steam shower should be no more than eight feet tall to prevent the steam from rising above the shower area. For example, a 13-foot ceiling will leave the client in the cold instead of enjoying the health-inducing effects of their steam shower.
If the shower has a higher ceiling, you’ll need a larger generator to fill the compartment with steam. To determine the size of the generator, enter the shower’s dimensions into MrSteam’s VirtualSpa tool.
INTERIOR
When it is time to decide where to place the control tech, floor drain, and bench seating, here are a few questions to consider:
-
Will the floor be recessed or elevated?
-
Will the shower have non-slip floor protection?
-
Are there accessibility/mobility considerations?
-
Is a linear drain the right choice?
-
Where should the shower nozzle be placed?
-
What space is needed and available for the generator placement?
-
Is the generator storage space enclosed and insulated?
-
Are the inside shower building materials non-porous, such as marble, acrylic, or ceramic tile? What about natural stone or porcelain tile?
-
Is a hot mop, vapor barrier, or closed cell membrane (also known as a wedi-board) the best way to prevent mold and mildew?
In addition, the following are must-have comfort considerations:

-
Shower seats should be either built-in or fold-up to maximize space; Shower seats should be 15” deep and 18” off the shower floor.
-
Locate shower controls near the seating for easy access, four to five feet off the floor and on the wall opposite the showerhead;
-
Ensure that the exterior shower room windows have double panes and shower doors are water-tight using rubber glazing gaskets or strips on each side of the glass;
-
Add a silicon weather strip at the bottom of the shower door to make a tighter seal;
-
All sealed light fixtures should have steam ratings, and use 75 watt halogen lamps;
-
Always lay a thick bead of silicone caulk on shower curbs and side rails and joints where frames meet walls; and
-
Install a standard bathroom exhaust fan outside the steam shower to prevent mold and mildew.
Installing The Steamhead
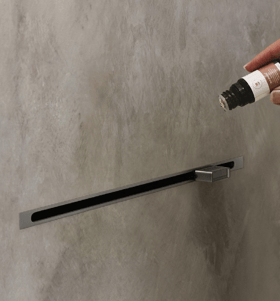 The steamhead delivers the warm vapor into the shower enclosure. Here are a few installation tips.
![]() The first thing to do is locate the proper location for the steamhead. Ideally, this should be between 6-12 inches off the floor on the wall opposite the seat or bench.
The first thing to do is locate the proper location for the steamhead. Ideally, this should be between 6-12 inches off the floor on the wall opposite the seat or bench.
![]() Next, the showerhead should sit flush with the finished wall, including the cement board and thinset (the mortar made specifically for tile). When installed in this manner, the wall will contain the linear showerhead within it. This makes it inconspicuous and harmonious with its surroundings.
Next, the showerhead should sit flush with the finished wall, including the cement board and thinset (the mortar made specifically for tile). When installed in this manner, the wall will contain the linear showerhead within it. This makes it inconspicuous and harmonious with its surroundings.
![]() The third step is to connect the showerhead to the steam pipe using a 3/4” NPT thread fitting.
The third step is to connect the showerhead to the steam pipe using a 3/4” NPT thread fitting.
![]() Before you start, read the complete installation and operating instructions in the MrSteam manual.
Before you start, read the complete installation and operating instructions in the MrSteam manual.
Installing Plumbing
The plumbing is another critical component of installing a steam shower, whether the shower is part of a new construction or remodeling an existing bathroom. It is essential to understand the needed steam shower plumbing connections. Installers may also find MrSteam’s Virtual Steam Technical Support Center helpful.
IMPORTANT PLANNING CONSIDERATIONS INCLUDE:
-
Reading the manual in full before starting eliminates headaches during the project;
-
Make sure all materials are steam-rated;
-
Have both 1/2" and 3/4" unions ready;
-
Install a pipe for the electrical wires (this makes threading easier in case of later replacements);
-
Lower water pressure to 12-25 PSI; and
-
On remodels, install the AirButler Steam package which includes the wireless AirTempo Control and eliminates running cable to the generator.
HERE ARE A FEW "DO NOT" RULES FOR THE INSTALLATION PROCESS.
DO NOT:
-
Install the control panel right above the steamhead;
-
Install a fan inside the shower;
-
Install the seat or bench too close to the steamhead. Users do not want burned legs and feet.
Installation of Electrical Power
 The first step is to leave a 1/2” clearance hole around the steam pipe to mount the steamhead.
You can prevent door seals from deteriorating by choosing a steamhead location that will prevent steamhead emissions from contacting the door seals.
Then, to reduce noise from the steamhead, locate it more than 12” from the wall. If the shower enclosure uses non-heat-resistant materials, install the Acrylic Shield Part No. 103938.
Run 1/2” copper steam piping from the generator to the drop ear fitting on the header. Installing a nipple in the drop ear fitting will help locate the steamhead in the wall after the installation is complete.
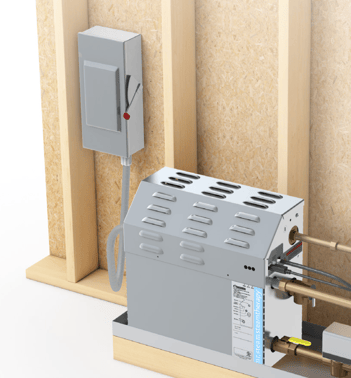
MrSteam’s steam showers use 240V (or 208V) single-phase household electric. All shower controls should be low-voltage with no ground fault circuit interrupter (also known as GFCI). The project will require a separate panel for the generator and a dedicated circuit breaker.
Only a licensed electrician should install the power required for the generator. Never install heating, exhaust, venting, or air conditioning units inside the steam room.
Never use wrenches or other tools that could damage the steamhead finish. Wrap threads with teflon tape and hand-screw pieces of the assembly together.
 Choose a Place For The Generator
Use a compact, UL-listed steam generator. You can determine the exact generator model you need by entering the dimensions of your shower into MrSteam’s VirtualSpa sizing tool. Besides telling you the cubic footage of your proposed steam shower, the VirtualSpa tool will recommend a generator appropriate for a shower of that size.
Be sure to place the generator within 60 feet of the shower. Common locations are closets, vanities, heated attics, or under the steam shower with an access panel on the outside of the shower.

Consider Steam Packages
MrSteam offers the xDream, Steam@Home, and xButler packages. They are similar except for the differences in control systems and accessories. xDream includes all the SteamTherapies, whereas Steam@Home is a more compact package suitable for a pool house or guest bath. The xButler package consists of the AromaSteam Steamhead and SteamLinx.
Choosing the generator size, the tech control, steamhead, and accessories or enhancements is easy with the VirtualSpa tool. Choices may be made à la carte through the tool, or select a steam package that fits your customer’s needs.
Add-Ons
There is the possibility of add-ons for the steam shower, such as various SteamTherapies. If the customer picks the xDream package, the steam shower system includes all SteamTherapies.
STEAMTHERAPIES
MrSteam SteamTherapies include options such as:
- AromaTherapy - The AromaSteam System uses essential oils to scent the steam to enhance the steam shower experience, whether for relaxation or energizing.
- ChromaTherapy - Choose the color of light to reflect or enhance mood.
- MusicTherapy - Everything is better with music, including a steam shower. Select listening options from MrSteam’s iSteamX control, smartphones, iPhones, tablets, or any Bluetooth®-enabled device.
ACCESSORIES 
Customers have various choices to make concerning accessories for their steam shower, such as:
- SteamLinx - Control the steam shower remotely using a smartphone or mobile device to start, adjust, or stop it with a tap.
- Wall-Mounted Folding Seat - Ideal for smaller spaces.
- AutoFlush - Water can leave sediment over time. To preserve the functionality of the steam generator effortlessly, invest in AutoFlush to rid it of sediment buildup.
- Condensation Pan - Ensure no steam condensation escapes by installing a condensation pan under the steam generator.
Finding Technical Manuals
This guide covered critical installation considerations. In addition, the instructions for installing every accessory, SteamTherapy, generator, or package can be found in MrSteam’s technical guides. Refer to our Residential Steam Shower Manuals. If those are insufficient, MrSteam has a Virtual Technical Support Center with troubleshooting guides and a FAQ for builders and designers.
 Final Considerations
This guide covered critical installation considerations. In addition, the instructions for installing every accessory, SteamTherapy, generator, or package can be found in MrSteam’s technical guides. Refer to our Residential Steam Shower Manuals. If those are insufficient, MrSteam has a Virtual Technical Support Center with troubleshooting guides and a FAQ for builders and designers.
REMEMBER
Steam shower installation requires you to consider the dimensions of intended users for maximum comfort and functionality.
At every stage, MrSteam makes it easy for clients to select features and accessories with the VirtualSpa tool and inclusive steam packages.
HAVE A QUESTION THAT ISNT ADDRESSED IN THIS GUIDE?
Call today to speak with one of MrSteam's steam shower experts.


